RO Re-Pressurization Installation Resources
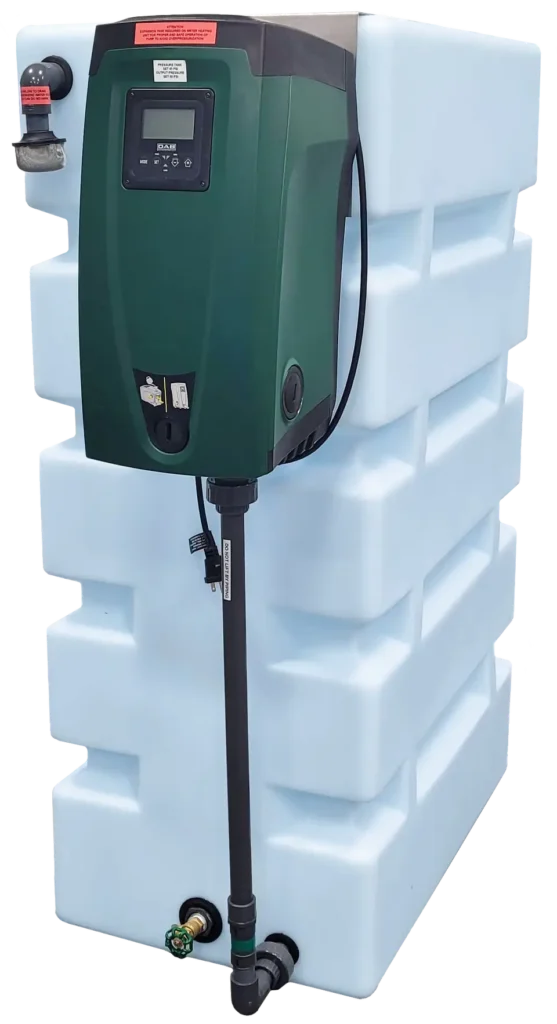
The RO Re-Pressurization System collects and stores water produced by a reverse osmosis system, then uses a booster pump to deliver the treated water at consistent pressure for use throughout the home or application.
Proper system placement, plumbing, electrical connections, RO equipment integration, and setup are important to ensure the system operates as intended.
Your Installation Guide
Every RO Re-Pressurization System includes a detailed installation guide with system-specific instructions for plumbing, electrical connections, RO integration, setup, startup, testing, and maintenance. Your installation guide is provided with your system and should be reviewed by you and your installer before installation begins.
The resources below are designed to help you plan ahead and better understand the installation requirements for your RO Re-Pressurization System.
Jump to a Section
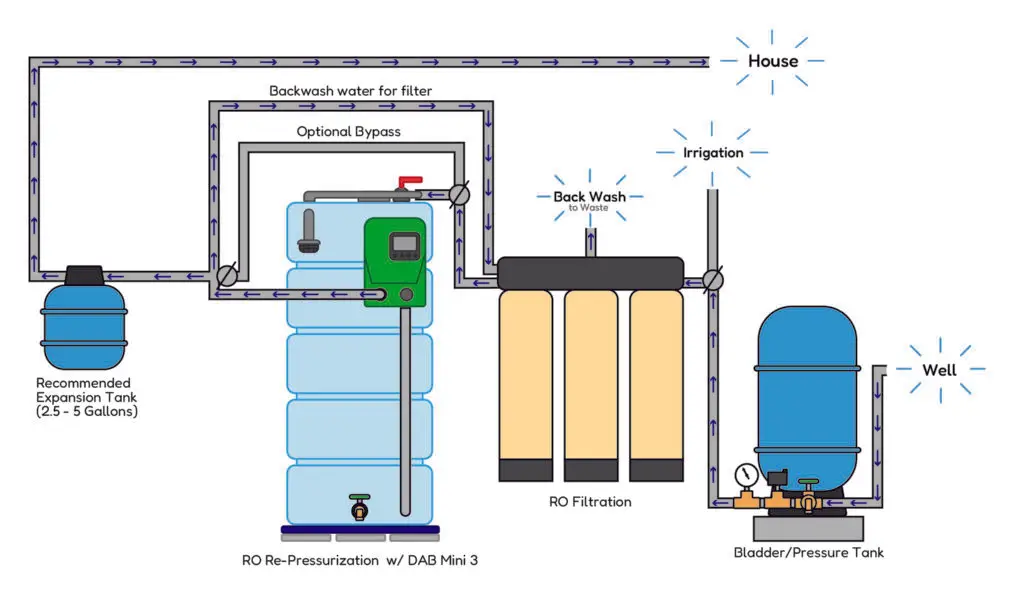
Where the RO Re-Pressurization Fits in Your Water Line
The RO Re-Pressurization System is installed after the reverse osmosis treatment equipment. Treated water produced by the RO system is collected in the storage tank, then re-pressurized by the booster pump before being supplied to the home or application.
The exact layout may vary depending on the RO equipment, additional water treatment, and system configuration.
Diagram highlights pre- and post-filtration recommendations for a complete setup.
Installation Note: For best performance and to help prevent rapid pump cycling, install a bladder tank on the discharge side of the pump. DAB recommends sizing the bladder tank based on your pump’s normal peak flow:
- 2-gallon bladder tank – E.SYBOX Mini 3 (approximately 10 GPM)
- 4-gallon bladder tank – E.SYBOX, DTRON 2, and DIVER (approximately 20 GPM)
- 10-gallon bladder tank – E.SYBOX MAX (approximately 50 GPM)
How the Storage Tank Refills
Water produced by the reverse osmosis system flows into the RO Re-Pressurization storage tank. A float inside the tank communicates with the RO system to control water production as the tank fills and empties.
An electronic tank level control may also be available as a custom option for applications requiring a different control configuration.
Have Existing Water Treatment?
Water softeners, iron filters, UV systems, and other treatment equipment can be incorporated into a Well Watcher™ installation. Placement may vary depending on the type of treatment and your existing water system.
If you’re unsure where your existing equipment should be located, contact our team for help reviewing your installation layout.
System Dimensions & Space Requirements
RO Re-Pressurization Systems are available in multiple tank orientations and pump configurations to accommodate different installation spaces. Review the dimensions of your system before installation, including the space needed for the tank, booster pump, plumbing connections, and access for future service.
Vertical 210 gallon
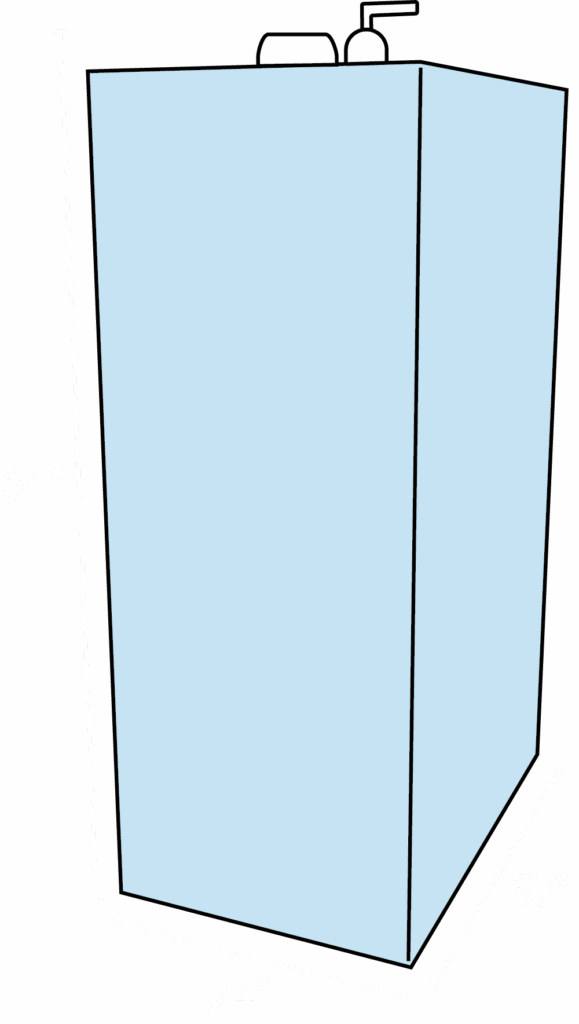
L37″ x W24″ x H64″
Effective Water Storage: 195gal
Horizontal 210 gallon

L60″ x W24″ x H42″
Effective Water Storage: 185gal
Low Horizontal 210 gallon

L60″ x W37″ x H28″
Effective Water Storage: 175gal
Vertical 100 gallon

L24″ x W24″ x H52″
Effective Water Storage: 90gal
Your Pump Configuration Can Affect System Space
The amount of installation space required can vary depending on the booster pump selected and whether the pump is installed internally, externally, wall-mounted, or alongside the system.
Review your specific system configuration when planning the installation area, and allow adequate space for plumbing connections and future access to the pump and system components.
Planning a Multi-Tank System?
Additional storage tanks can be added to increase available water storage. Because multi-tank systems can be arranged differently depending on tank orientation, pump configuration, and available space, overall dimensions will vary by installation.
Contact our team if you need help determining the footprint or layout of your specific configuration.
Plan for the Weight of a Filled System
A filled RO Re-Pressurization™ 210 tank can exceed 1,800 lbs. The system must be installed on a level concrete slab or a properly reinforced wood or steel subfloor capable of supporting the filled system.
Condensation should also be considered when selecting the installation location. A condensation pan and access to a nearby floor drain or sump area are strongly recommended.
Built for Water Storage
RO Re-Pressurization Systems use durable polyethylene tanks designed for potable water storage. Their ribbed construction provides added strength, with multiple tank orientations available to accommodate different installation spaces.
Explore our water storage tanks for more information about tank construction, dimensions, orientations, and features.
Simple Plumbing Connections
RO Re-Pressurization Systems arrive pre-assembled with much of the system plumbing already in place. For a typical installation, your installer will connect the incoming well line to the system and connect the system outlet back into the home’s main water line.
Standard RO Re-Pressurization Connections
- Inlet: 1/2″
- Outlet: 1″
A 3/4″ and 1″ inlet are available by custom order. Installers can also use appropriate reducers or adapters as needed to connect the system to existing household plumbing.
The piping between the storage tank and booster pump is typically provided by Well Manager based on the selected system and pump configuration. If the booster pump will be mounted away from the system, additional on-site plumbing may be required.
Plumb In → RO-RePressurization System → Plumb Out
Filtration & Expansion Tank
Plan for the required pre-filtration and expansion tank when completing your RO Re-Pressurization plumbing connections. Refer to the system layout and pump information above for placement and sizing details.
Plan for Overfill Drainage
The RO Re-Pressurization includes an overfill safety connection near the top of the tank as a backup in the event of an unexpected overfill. This connection must be routed to an appropriate drainage location, such as a floor drain, sump basin, standpipe, or other approved drainage area.
Plan for drainage when selecting your system location. Flexible tubing or PVC can be used to safely direct overflow away from the system and surrounding floor area.
RO System Connection
A float inside the RO Re-Pressurization storage tank connects to the reverse osmosis system to control water production based on the tank’s water level. As stored water is used, the float signals the RO system to produce additional treated water and refill the tank.
Need a Different Plumbing Configuration?
The RO Re-Pressurization is built with a standard 1″ inlet and 1″ outlet. A 3/4″ or 1″ inlet can be requested as a custom option, and installers may use reducers or adapters where needed to connect the system to existing plumbing.
If your project requires a different pump location, piping arrangement, or a custom commercial configuration, let our team know before your system is built.
Electrical Requirements
The RO Re-Pressurization System and booster pump require proper electrical service for safe and reliable operation. Electrical requirements vary depending on the booster pump selected, so available power should be considered when planning your system configuration and installation location.
RO Re-Pressurization System
115V
Dedicated 15A Circuit
The tank float must be connected to the RO equipment during installation. Detailed connection instructions are provided with your system.
Booster Pump
Varies by Pump
Requirements depend on the selected booster pump.
Electrical Installation
Dedicated circuits are required and should not be shared with other equipment. Connections to the home’s breaker system should be completed by a licensed electrician and must follow applicable local electrical codes.
Always disconnect power before working on system wiring or electrical components.
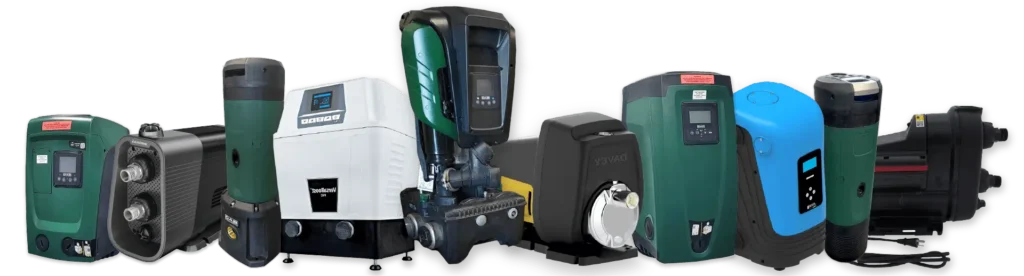
Booster Pump Options
The RO Re-Pressurization can be configured with different booster pumps based on your home’s water demand, desired pressure, available electrical service, and installation space.
Your selected pump may be installed inside the tank, alongside the system, or in another suitable location depending on the pump and system configuration.
For pump specifications, electrical requirements, dimensions, and available options, visit our Booster Pump Options page.
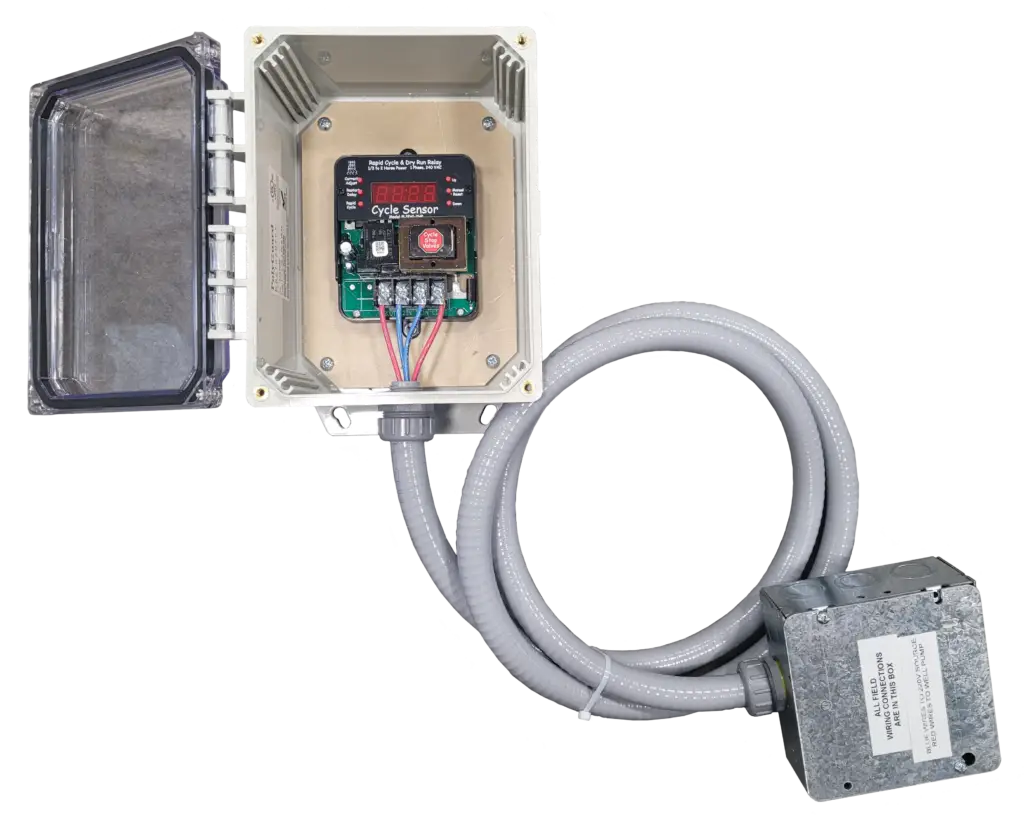
Optional Cycle Sensor
For RO Re-Pressurization Systems supplied by a well, an optional Cycle Sensor can provide additional protection for the well pump by monitoring its operation.
If your system includes a Cycle Sensor, setup instructions are provided with your system. Our team can also help determine whether a Cycle Sensor is appropriate for your well and system configuration.
RO Re-Pressurization Installation FAQs
Where does the RO Re-Pressurization System go in my water line?
The RO Re-Pressurization System is installed after the reverse osmosis treatment equipment. Treated water produced by the RO system is collected in the storage tank, then delivered to the home or application at consistent pressure using the booster pump.
How does the RO system know when to refill the storage tank?
A float inside the RO Re-Pressurization storage tank connects to the reverse osmosis equipment to control water production based on the tank’s water level. As stored water is used, the RO system can produce additional treated water to refill the tank.
Detailed connection instructions are provided in the installation guide included with your system.
Can the RO Re-Pressurization System work with my existing RO equipment?
The RO Re-Pressurization System can be incorporated with many reverse osmosis setups, but the final configuration depends on the RO equipment and how it controls water production.
Contact our team if you’re unsure whether your existing RO equipment is compatible or how it should connect to the storage system.
Can the system be customized for a different RO setup?
Yes. Standard RO Re-Pressurization Systems use a float to communicate with the RO equipment, but custom configurations may be available for applications with different control requirements, including an electronic tank level control.
Contact our team before ordering if your RO system requires a different fill or control configuration.
5. Can my plumber install an RO Re-Pressurization System?
Yes. The RO Re-Pressurization System can be installed by a qualified plumber or other experienced professional familiar with water treatment and reverse osmosis equipment. Electrical connections to the home’s breaker system should be completed by a licensed electrician, and all plumbing and electrical work must follow applicable local codes.
We recommend that both the system owner and installer review the installation guide included with the system before installation begins.
Can Well Manager help my installer before or during installation?
Yes. Our team can help answer questions about your system configuration, placement, pump setup, plumbing, electrical requirements, and other installation considerations. We can also provide custom system layouts when additional planning is needed.
For more involved installation questions, you or your installer can schedule a call with our team to review the system and discuss your installation needs.
Preparing for Your RO Re-Pressurization Installation?
Your RO Re-Pressurization System will arrive with a detailed installation guide specific to your system and configuration. Be sure to review the guide with your installer before beginning installation.
If you or your installer have questions while planning or installing your system, our team is available to help with system placement, plumbing, electrical requirements, pump setup, RO integration, and other installation questions. You can also schedule a call with our team for additional installation support.
Need Help Visualizing Your Installation?
Every installation is different. Our team can create a custom system layout to help you better understand how your Well Manager system may fit, connect, and be configured before installation.
Layouts can be tailored to your space, system configuration, pump selection, water treatment equipment, and other installation needs.
- Photos of the proposed installation area
- Overall room or available-space dimensions
- Ceiling height and doorway/access measurements
- Existing plumbing and incoming water-line location
- Pressure tank and water treatment locations
- Available electrical service
- Furnaces, water heaters, appliances, or other equipment that cannot be moved
Space & Placement

System Dimensions

Plumbing & Equipment
