How to Unpack a Well Manager System
Unpacking & What to Expect
Just received your Well Manager System? In this video, we walk through how to unpack a Well Manager system, what components to expect, and how to prepare for installation. Whether you are a homeowner, contractor, or installer, this overview will help ensure your system arrives safely, parts are accounted for, and everything is ready before setup begins.
Before installation begins, it is important to properly unpack and inspect your system. This video explains how to unpack a Well Manager system, what components may be included with your shipment, and how to safely prepare your system for installation. You’ll learn what to check when your shipment arrives, how to identify major components, and what steps to take before moving forward with setup. Taking a few extra minutes during unpacking can help ensure a smoother installation process and avoid surprises later.
What This Video Covers
- How to safely unpack your Well Manager System
- What components may arrive with your shipment
- What to inspect after delivery
- How to prepare for installation day
- Tips for homeowners, contractors, and installers
Receiving Your Well Manager System
Receiving a new water system is exciting, but before installation begins, it is important to carefully unpack and inspect your shipment.
Your Well Manager System is designed to arrive protected and organized for transport. Depending on the system ordered, components may arrive palletized, secured, or packaged separately to help prevent shipping damage.
Before unpacking, take a moment to inspect the shipment and surrounding packaging for any visible signs of damage that may have occurred during transport.
How to Properly Unpack the System
When unpacking your system, remove packaging materials carefully and avoid using tools that could accidentally damage components, tubing, wiring, or system parts.
As you unpack, organize parts and identify major system components so everything is ready for installation.
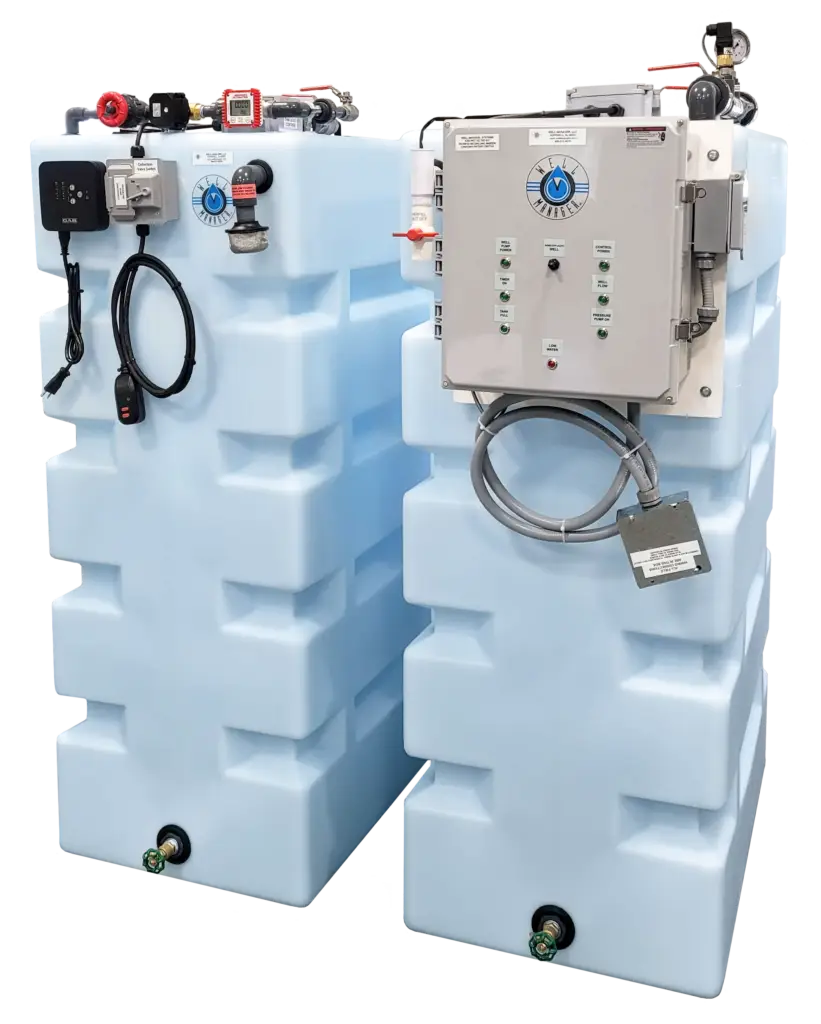
Depending on your configuration, your shipment may include:
- Storage tank(s)
- Control panel or system controls
- Float components
- Plumbing fittings or accessories
- Pump options (depending on system type)
- Additional add-ons ordered with the system
Because systems are customized, included components may vary based on your quote and setup.
What to Check Before Installation
Before installation begins, it is helpful to:
- Verify all major components arrived
- Check for visible shipping damage
- Confirm access points and installation space measurements
- Review system orientation and placement plans
- Identify where plumbing and electrical connections will be made
Taking time to prepare beforehand can help make installation smoother and reduce delays.
Preparing for a Smooth Installation
Whether your system is being professionally installed or handled by an experienced homeowner, proper preparation helps ensure a better experience.
Having components unpacked, inspected, and organized ahead of time allows installers to work more efficiently and helps avoid unexpected issues once installation begins.
If questions come up during unpacking or setup preparation, our team is available to help guide you through the process.
Preparing for Installation?
If you have questions about unpacking, installation prep, or system components, our team is here to help.